Tall planters are all the rage in modern gardening, and it’s no wonder why. They not only provide an elegant focal point in your garden but also allow you to experiment with various plant combinations, creating a stunning visual impact.
How to fill tall planters? In this comprehensive guide, we’ll delve into the art of filling tall planters with style and explore creative ways to make your garden stand out. Whether you’re a seasoned gardener or just starting, these tips will help you elevate your gardening game.
Choosing the Right Tall Planter
Tall Planters: A World of Choices
When it comes to choosing the perfect tall planter, you’ll find a wide variety of materials available. Each material has its own unique characteristics:
- Ceramic Planters: Ceramic planters are popular for their elegant and artistic designs. They add a touch of sophistication to any outdoor space. However, they can be heavy and may require extra care during freezing temperatures to prevent cracking.
- Metal Planters: Metal planters, such as those made from steel or aluminum, are durable and weather-resistant. They can withstand harsh outdoor conditions and are often used in modern and industrial-style gardens. Keep in mind that metal can heat up in direct sunlight, potentially affecting the soil temperature.
- Wooden Planters: Wooden planters offer a natural and rustic charm. They blend seamlessly with traditional garden settings. However, wood requires regular maintenance to prevent rot and decay. Consider using cedar or redwood for their natural resistance to insects and decay.
Select a planter material that aligns with your garden’s aesthetic and climate. If you live in an area with extreme temperature fluctuations, you might want to consider materials like fiberglass, which are known for their durability in such conditions.
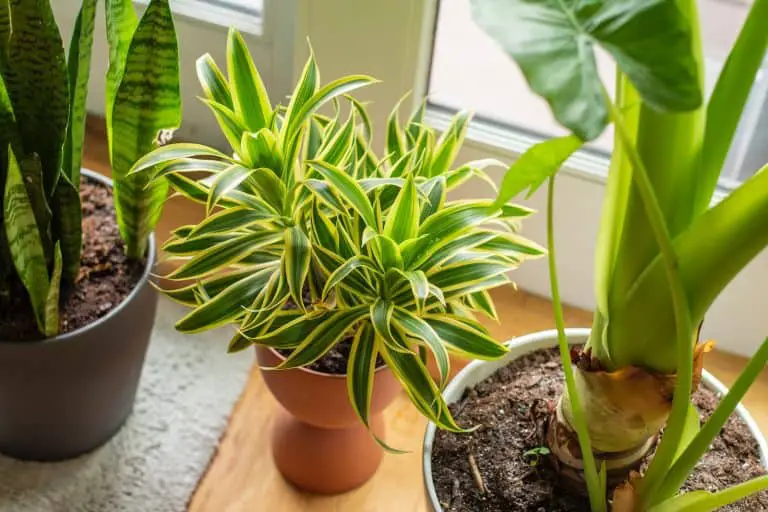
Selecting the Perfect Plants
Plants That Reach for the Sky
When it comes to tall planters, your choice of plants is key to creating a stunning display. Here are some plant suggestions:
- Tall Perennials: Plants like delphiniums, foxgloves, and verbena bonariensis can add height and color to your tall planters. These perennials return year after year, providing long-lasting beauty.
- Ornamental Grasses: Grasses like Miscanthus and Pennisetum are excellent choices for adding texture and movement to your planters. Their feathery plumes sway gracefully in the breeze.
- Dwarf Trees: For a touch of drama, consider planting dwarf trees like Japanese maples or columnar evergreens. These trees are well-suited for tall planters and create a focal point in your garden.
When selecting plants, consider their growth habits and care requirements. Some tall plants may have deep roots, so make sure your planter has enough depth to accommodate them. Additionally, choose plants that thrive in the amount of sunlight your garden receives.
Layering and Arranging
The Art of Layering
Layering plants in tall planters is an art that can elevate your gardening game. Here’s how to do it effectively:
- Tall Centerpiece: Start with a tall centerpiece plant. This could be a striking ornamental grass, a tall perennial, or a dwarf tree. Place it in the center of the planter to draw the eye upward.
- Mid-Height Plants: Surround the centerpiece with mid-height plants. These could be flowering perennials or foliage plants that complement the centerpiece. Arrange them in a circular pattern or a staggered formation for visual interest.
- Trailing Plants: Finally, add trailing or cascading plants around the edges of the planter. These spill over the sides, softening the overall look and adding a sense of lushness.
Consider the color palette of your plants when arranging them. Harmonious color combinations can create a cohesive and visually appealing display.
Adding Decorative Elements
Enhancing Style with Decor
To take your tall planter to the next level, consider incorporating decorative elements:
- Decorative Stones and Pebbles: Scatter decorative stones or pebbles on top of the soil to create a polished look. These not only add style but also help retain soil moisture.
- Seasonal Decorations: Embrace the changing seasons by adding seasonal decorations to your planters. Think miniature pumpkins for fall, colorful Easter eggs for spring, or twinkling lights for the holidays.
- Plant Stands and Trellises: If you want to maximize the height of your planter, use plant stands or trellises. These provide additional support for climbing plants and add architectural interest to your garden.
Don’t be afraid to get creative with your decorative elements. Experiment with different textures and colors to achieve the desired look.
Maintenance and Care
Nurturing Your Vertical Garden
Maintaining tall planters is essential to ensure the health and longevity of your plants. Here are some maintenance and care tips:
- Proper Watering: Tall planters can dry out more quickly than ground beds, so monitor soil moisture regularly. Water thoroughly when the top inch of soil feels dry. Ensure that your planter has drainage holes to prevent waterlogged soil.
- Fertilizing: Tall planters may require more frequent fertilization because nutrients can leach out with watering. Use a balanced, slow-release fertilizer to provide essential nutrients to your plants throughout the growing season.
- Pruning and Deadheading: Regularly prune and deadhead your plants to encourage new growth and maintain their shape. Remove any dead or yellowing leaves to keep your planter looking fresh.
- Weather Protection: During extreme weather conditions, such as frost or intense heat, consider moving your tall planters to a more sheltered location. This can help protect your plants from stress and damage.
- Seasonal Changes: Embrace the seasons by changing the plants or decorations in your tall planters. This keeps your garden looking vibrant and interesting year-round.
By following these maintenance guidelines, you’ll ensure that your tall planters remain a beautiful focal point in your garden for years to come.
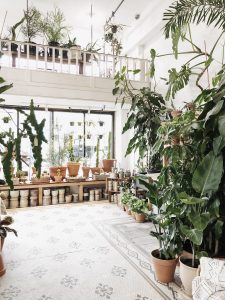
Real-Life Inspirations

Stunning Tall Planter Examples
Sometimes, the best way to find inspiration is by seeing what other gardeners have accomplished. Here are some real-life examples of stylish tall planter arrangements:
- Jay Scotts Planters: Jay Scotts offers a range of high-quality tall planters in various styles and materials. Their fiberglass planters are known for their durability and sleek design, making them a popular choice among gardeners looking to create elegant vertical gardens.
- Creative Plant Combinations: Some gardeners mix tall plants with shorter ones in the same planter to create a layered effect. For example, a tall grass in the center surrounded by colorful flowers can be visually striking.
- Unique Planter Fillers: Instead of traditional filler materials, some gardeners use creative alternatives like wood chips, broken pottery, or even colorful stones to add interest and drainage to their planters.
These examples demonstrate the endless possibilities when it comes to filling tall planters with style. Let your imagination run wild, and don’t be afraid to try new ideas in your own garden.
The Importance of Proper Drainage
Preventing Waterlogged Soil
One critical aspect of filling tall planters with style is ensuring proper drainage. Without adequate drainage, excess water can accumulate in the bottom of the planter, leading to waterlogged soil and root rot. Most tall planters come with drainage holes pre-drilled, but if yours doesn’t, it’s essential to create them. Here’s how:
- Gather Your Tools: You’ll need a power drill with a masonry or ceramic drill bit, a piece of tape, a pencil, and safety goggles.
- Mark the Hole Locations: Use a pencil to mark the spots where you want to create drainage holes. These holes should be evenly spaced and located near the bottom of the planter.
- Secure the Tape: To prevent the drill bit from slipping, place a piece of tape over each marked spot. This will help keep the drill bit in place during drilling.
- Drill the Holes: Put on your safety goggles and carefully drill through the marked spots, applying gentle pressure. Take your time and allow the drill bit to do the work.
- Clean Up: After creating the drainage holes, remove any dust or debris from the planter. You can also use a file to smooth any rough edges around the holes.
Proper drainage is essential for the overall health of your plants. It ensures that excess water can escape, preventing root suffocation and waterborne diseases.
Using Filler Material
Making Your Planter Lighter and More Efficient
Filling the bottom of your tall planter with filler materials serves several purposes. It makes the planter lighter, improves drainage, and saves money on potting soil. Here are some common filler materials you can use:
- Empty Plastic Containers: Collect empty plastic containers, such as yogurt or margarine tubs, and place them in the bottom of the planter. These containers are lightweight and provide excellent drainage.
- Plastic Bottles: Another lightweight option is to use empty plastic bottles. Fill them with water to add weight to the bottom of the planter while still improving drainage.
- Aluminum Cans: Crushed aluminum cans are an eco-friendly choice for filling space at the bottom of the planter. They are lightweight and won’t deteriorate over time.
- Styrofoam Packing Peanuts: Styrofoam packing peanuts are an effective filler material, but they should be used with caution. Ensure that they are tightly packed to prevent settling, which can create uneven planting conditions.
- Broken Pottery: If you have broken ceramic or clay pots lying around, use the shards to create a drainage layer. This adds a rustic touch to your planter.
When adding filler material, aim to fill the bottom one-third to one-half of the planter. This creates a sufficient reservoir for excess water to drain while still providing ample room for plant roots to grow.
Choosing High-Quality Potting Soil
Providing Nutrients for Your Plants
While you’re using filler material in the bottom of your tall planter, it’s crucial to provide your plants with top-quality potting soil. The soil you choose will directly impact the health and growth of your plants. Here are some considerations:
- Good Gas Exchange: Look for potting soil that provides good gas exchange. This means the soil allows air to circulate around the roots, which is vital for plant respiration.
- Nutrient-Rich Mix: Opt for a potting soil mix that is rich in organic matter and contains essential nutrients. High-quality potting soil ensures that your plants have access to the nutrients they need for healthy growth.
- Moisture Retention: The potting soil should retain moisture but not become waterlogged. It should strike a balance between holding water and allowing excess water to drain away.
- pH Balance: Check the pH of the potting soil to ensure it is suitable for the plants you plan to grow. Different plants have different pH preferences, so choose a soil that aligns with your plant selection.
Avoid using garden soil in tall planters, as it tends to be heavy and may not provide the necessary drainage and aeration. Invest in high-quality potting soil to set your plants up for success.
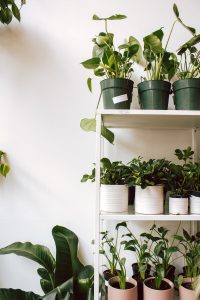
Maximizing Space
Creating Space Savers
Tall planters are an excellent solution for gardeners with limited space. They allow you to grow several smaller plants in one container, maximizing the use of your garden real estate. Here’s how you can create space-saving arrangements:
- Vertical Planting: Consider using tall planters with built-in pockets or compartments for individual plants. These designs are ideal for herbs, small flowering plants, or succulents.
- Tiered Planters: Explore tiered or stacked planters that have multiple levels for planting. These are perfect for creating a vertical garden on a small balcony or patio.
- Multi-Tiered Shelving: If you have a larger planter, use multi-tiered shelving or plant stands to create additional levels for planting. This not only saves space but also adds dimension to your garden.
Space-saving arrangements are particularly useful for urban gardeners or those with limited outdoor areas. They also make it easier to care for and access your plants.
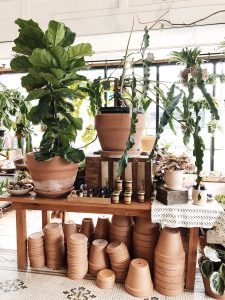
Permanent Installations
Long-Term Planting Solutions
Tall planters can serve as permanent installations in your garden. Here’s how to create a long-term planting solution:
- One Plant per Planter: Consider planting only one tall plant or tree per planter. This minimalist approach creates a stunning focal point in your garden and allows you to easily move the planter if needed, as it will be lighter without multiple plants.
- Weighted Base: For stability, ensure that your tall planter has a weighted base or is securely anchored to prevent it from toppling over in windy conditions.
- Low-Maintenance Plants: Choose low-maintenance plants that require minimal care. This reduces the need for frequent replanting and maintenance.
- Year-Round Interest: Select plants that offer year-round interest, such as evergreen trees or shrubs with colorful foliage. This ensures that your permanent installation remains visually appealing in all seasons.
Permanent tall planters can enhance the beauty and functionality of your garden, providing a sense of continuity and style.
Repurposing and Sustainability: Eco-Friendly Pot Fillers

Reusing Empty Potting Soil Bags and Plastic Milk Jugs
When filling your tall garden planters, consider embracing an eco-friendly approach by repurposing items that might otherwise end up in the landfill. Empty potting soil bags and plastic milk jugs are perfect candidates for this purpose.
Empty Potting Soil Bags: Rather than tossing out those empty potting soil bags, put them to good use as pot fillers. Roll them up tightly and place them in the bottom of your large planter. These bags not only provide excellent drainage but also help save money on buying additional filler material. Plus, they’re lightweight, making your planter easier to move if needed.
Plastic Milk Jugs: Empty plastic milk jugs can also serve as eco-conscious pot fillers. Rinse them thoroughly and remove the caps. Crush them slightly to create air pockets within the planter. By repurposing these common household items, you’re contributing to sustainability and reducing waste while providing your plants with a stable base for growth.
Adding Landscaping Fabric for Improved Drainage
To further enhance the drainage capabilities of your tall garden planters, consider incorporating landscaping fabric. This breathable material allows water to pass through while preventing soil from escaping. Here’s how to use it effectively:
- Cut the Fabric: Measure the dimensions of the bottom of your large planter and cut a piece of landscaping fabric to fit.
- Place the Fabric: Lay the cut fabric flat at the bottom of the planter. Ensure it covers the entire surface.
- Secure the Edges: Fold any excess fabric around the edges of the planter and secure it in place with staples or garden clips.
- Add Filler Material: Over the fabric, place your chosen pot fillers, such as empty potting soil bags or plastic milk jugs. The fabric acts as a barrier, preventing the filler material from mixing with the potting soil while still allowing water to drain freely.
By incorporating landscaping fabric in your tall planters, you not only improve drainage but also create a neat and organized planting environment.
Final Thoughts: How to Fill Tall Planters
Tall planters are more than just garden containers; they’re an opportunity to showcase your creativity and style. By following the tips and ideas in this guide, you can easily create stunning tall planter arrangements that will make your garden the envy of the neighborhood. Experiment, have fun, and watch your plants reach new heights of beauty and growth.
For more gardening advice and related articles, explore our website. If you have any questions or want to share your own tall planter success stories, feel free to leave a comment below. Happy gardening!
